|
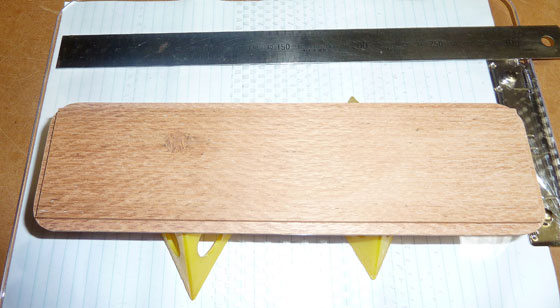
Cutting List
- Box Frame: Recycled Silky oak - 57mm x 8mm
- 2 x sides 241mm x 57mm x 8mm
- 2 x ends 71mm x 57mm x 8mm
- Box Lid: recycled Silky oak - 240mm x 63mm x 8mm
- Box Base: Recycled Silky oak - 232mm x 63mm x 8mm
- Box Insert (for SD cards etc): Recycled Western Red Cedar - 223mm x 50mm x 15mm
Step 1.
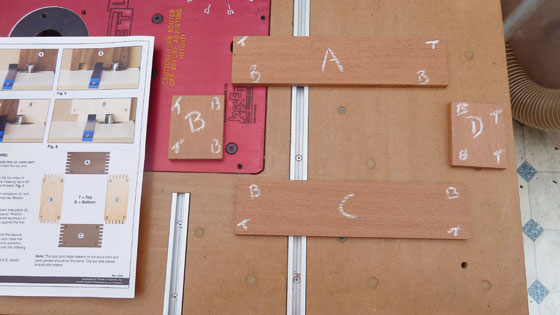
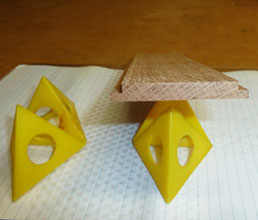
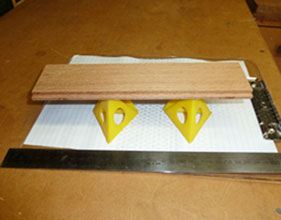
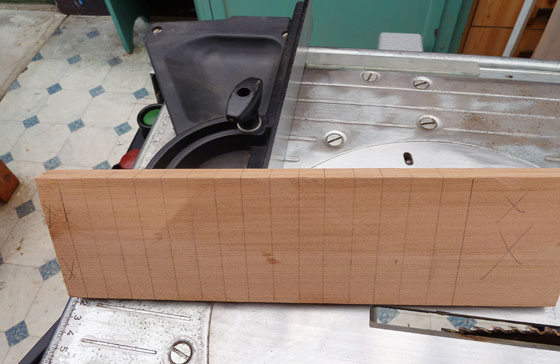
Cut all components to size and layout and “mark” as per instructions in Rockler instructions brochure. Sides and ends cut 1mm over length to allow for .5 mm excess box joint length – to be trimmed back after assembly and glue up.
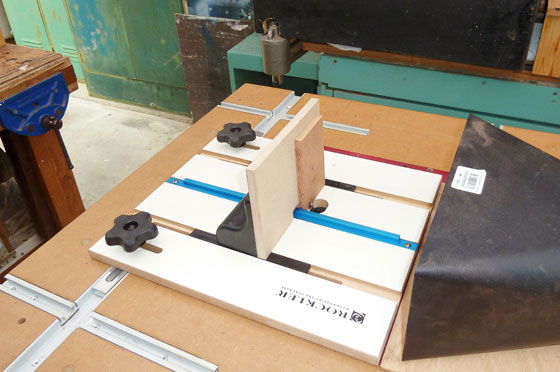
Step 2.
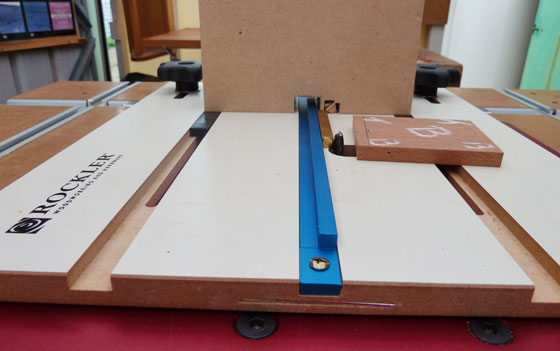
Set up ¼” Spiral upcut router bit in router table, set Rockler jig in place as per instructions. Adjust router bit to cutting depth required (allow .5 mm over thickness of boards) and space jig in position with ¼” space between router cutter and indexing key. An accurate method is to use a ¼” shank of a small router cutter or utilise a set of standard “space bars”.
Step 3.
Cut a “Trial” joint using some waste timber same size as your proposed project. Ensure “ Trial” joint fits firmly, adjust spacing or depth if required and when satisfied with correct positioning you are ready for your project.
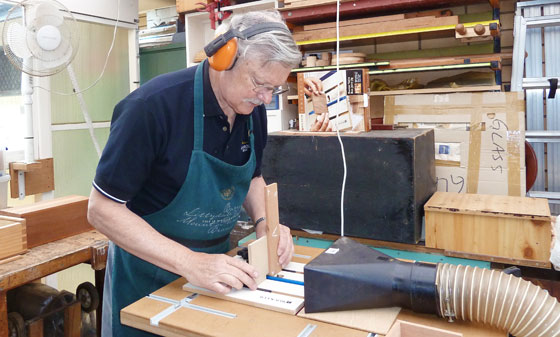
Step 4.
Set up Dust extractor to capture the volume of waste created. Commence project box joints.
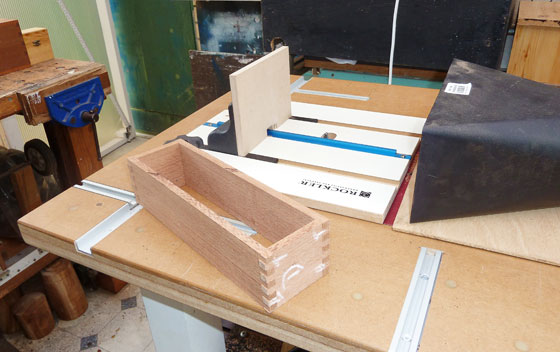
Step 5.
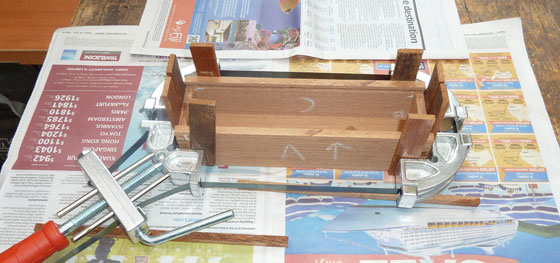
Dry assemble completed box frame
Step 6.
While box is dry assembled, if you have a suitable router cutter rout 4mm x 5mm deep groove around inside of base and inside of top at 8mm from bottom and similar distance from top. A little bit of chisel and saw work is required here to extend sliding lid groves and cutting end boards to correct height. (Alternatively utilise 4mm straight cutter and make relevant grooves where necessary) These grooves are designed to accommodate base board and sliding lid.
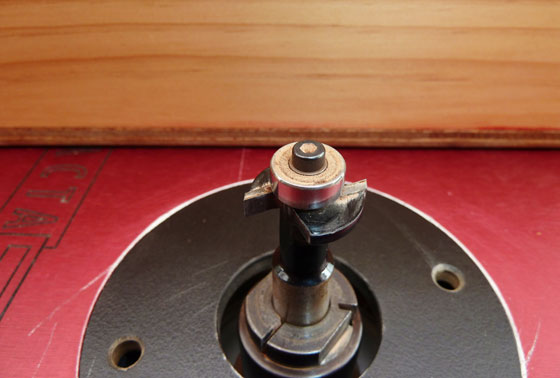
Step 7.
Cut base board 232mm x 63mm x 8mm; rout a rebate around each end and side 4mm x 5mm to fit into grooves created. (In my box I had to round out each corner to fit into grooves created with the special slot cutter shown in the image above).
Step 8.
Cut sliding lid 240mm x 63mm x8mm; rout rebate along each “long side only” to 4mm x 5mm to fit grooves created for sliding lid
Step 9.
Dry assemble box with base board;Check that sliding lid moves freely in grooves, confirm all fit OK, adjust if required and then glue and clamp. N.B. Rockler Box Joint Cauls RK-42784 and Rockler Deluxe Ratcheting Band Clamp Rk-41419 are the ideal items to use in this step of assembly and glue up. I don’t have these in my kit as yet.
Step 10.
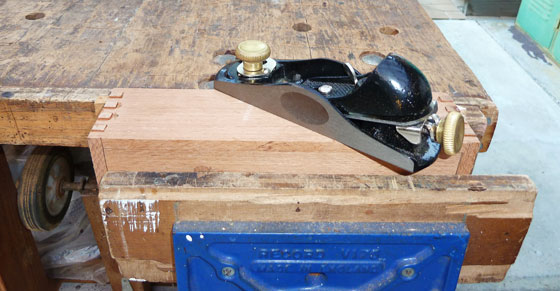
When all glue joints firm and dry, use a block plane to trim back extended ends of box joints (Alternatively use linisher or sander)
Step 11.
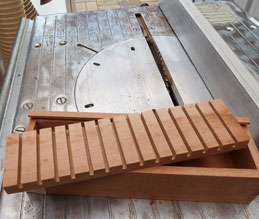
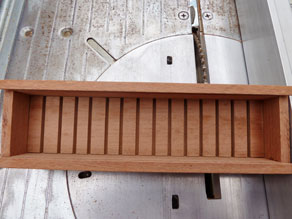
Mark insert base to hold SD cards. Space slots at 15mm intervals. Set 3mm kerf saw blade on table saw at 9mm height and proceed to cut each marked slot. Trim insert block to fit inside measurement of box. Lightly sand each slot and remove all loose sawdust. Glue to the inside bottom of box.
Step 12.
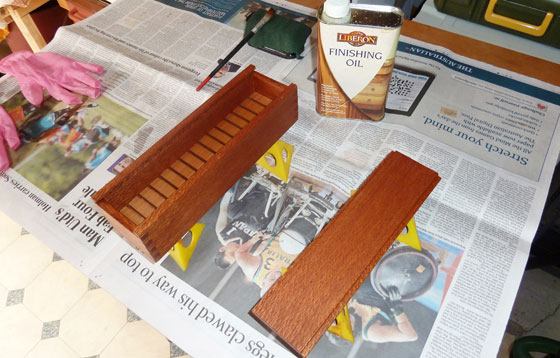
Sand all surfaces (Up to 400 grit is suitable) and use your preferred “finish”. I used 4 coats of Liberon Finishing oil (LBN-003819)
Step 13.
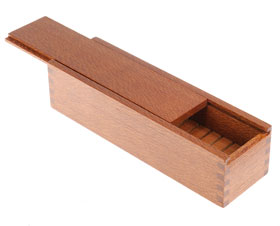
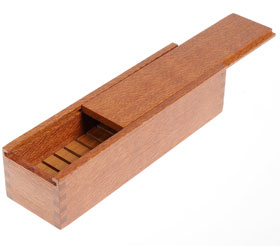
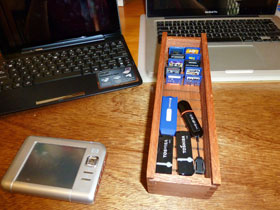
See photos of completed box with SD cards and Flash sticks.
|