This serving tray is a great project when you have a couple of spare days that you can spend in the workshop. It's a very useful item and a great way to show off the beauty of a special piece of timber. I had two lovely boards of American Walnut that had been waiting around for years to be turned into something. I thought a tray would be perfect, one of the boards had some wonderful figure that really lent itself to book-matching for the base.
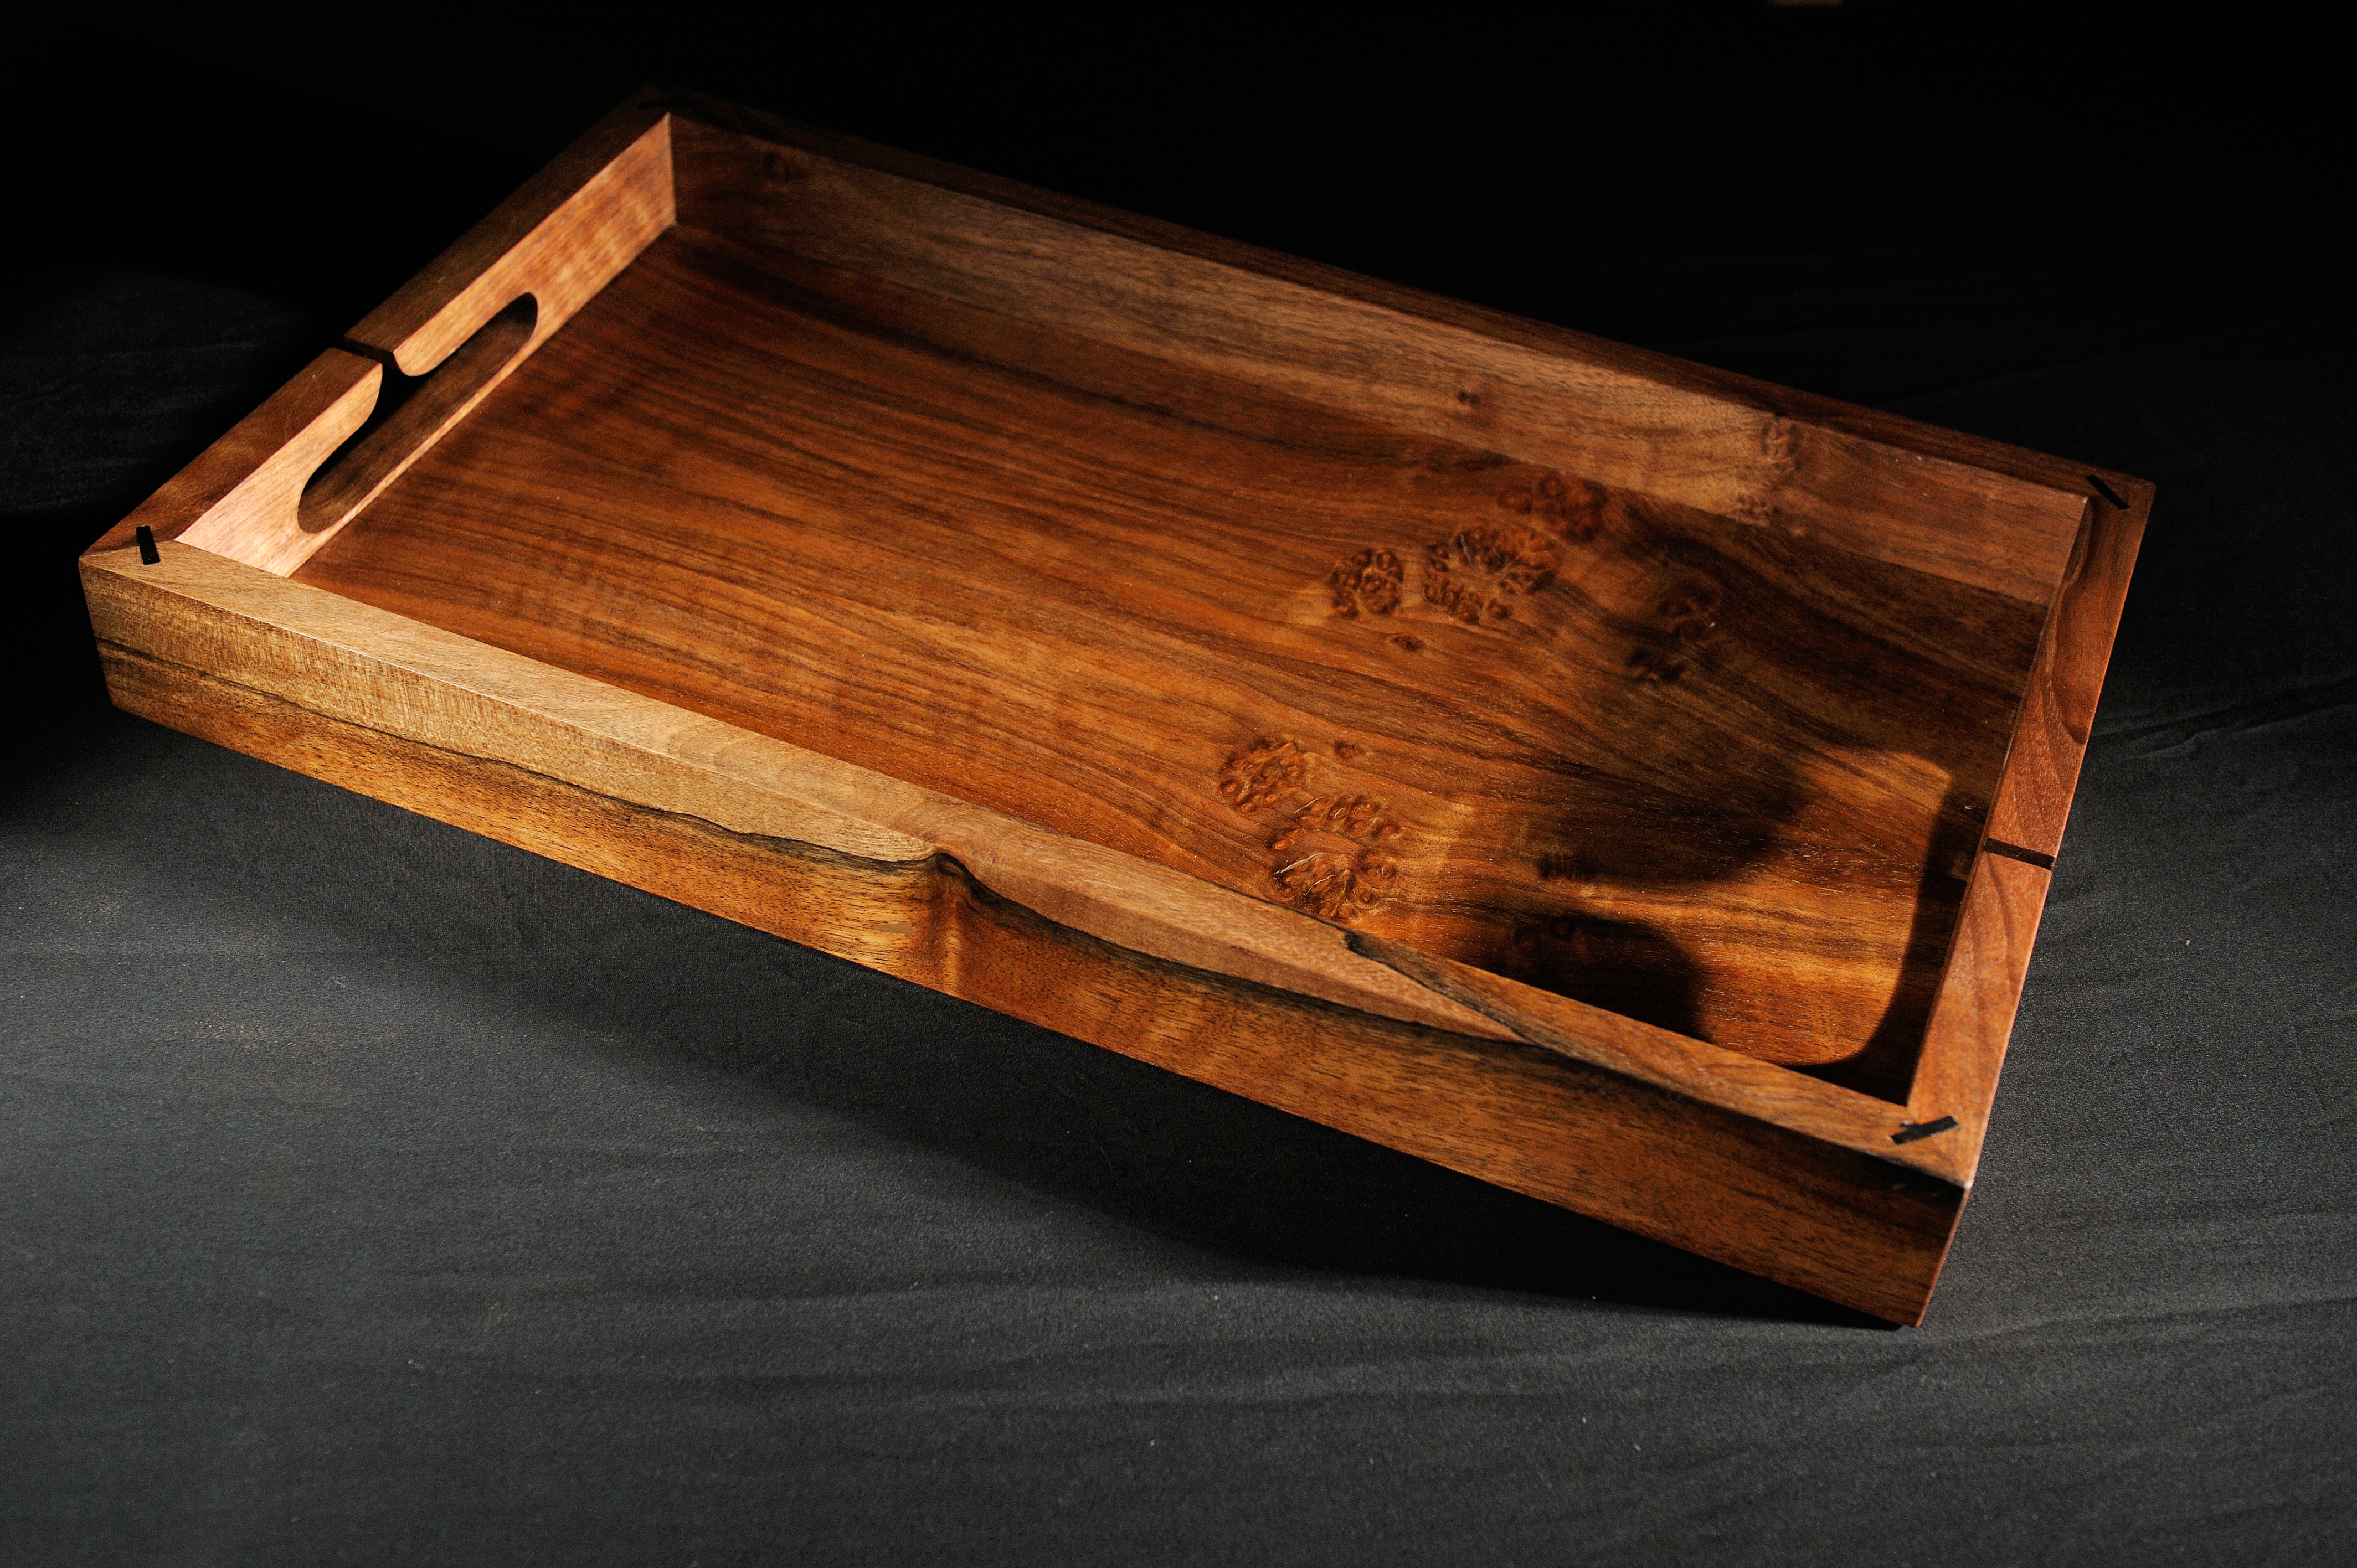 |
Trays are really useful and make great gifts, you get to use lots of different skills in their construction, but it's a project you can get through in a couple of days, so they aren't a massive time investment. You can use your own imagination with the handle design, I wanted to do something a bit different to what was around so I came up with this design. I used the scroll saw to cut out the basic shape and finished them off by hand. I liked the quirky offset look and found they felt good too.
Have a go at making a tray, it's a lot of fun. I have explained here how I went about it, but you can just use this as a guide, add your own style to it if you like. 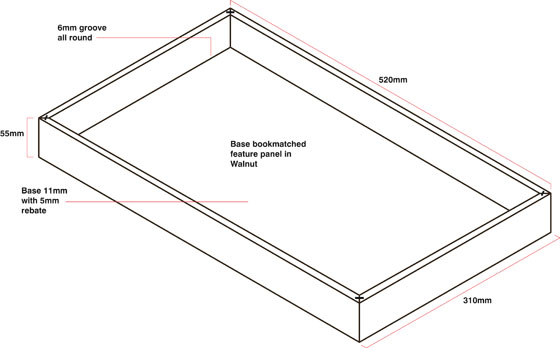 | Tray Dimensions and Details. | | | | | Spline Details | Handle Design Concept |
Cutting List - 2 x 520mm x 55mm x 18mm
- 2 x 310mm x 55mm x 18mm
- 1 x 500mm x 290mm x 11mm for the base
- Ebony for the inlays and material for the splines
Step 1.
Mill the timber and cut to size. Step 2.
Using a bandsaw, I ripped my 25mm board up the middle to reveal a beautiful book-matched pair of boards. This is a big cut to make so be careful. Walnut is pretty hard and I needed to take it slowly, listen to the saw, if you are overloading you will be able to hear it labouring. I was left with two boards about 11mm thick. Because the grain is a bit curly, I opted to use a hand plane to joint the edges. I wanted to avoid any tear out that a jointer might create. I used TITEBOND II glue to create a rub joint, rubbing the two piece together along the grain creates very good adhesion and is perfectly fine in this situation. If you want you can use biscuits or a spline to reinforce it. Clamp firmly and leave overnight to dry. 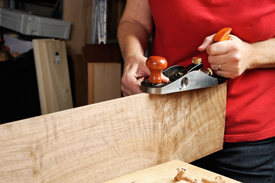 | |
Step 3.
Cut the Joinery for the sides. I have used splined mitres, but box joints, dovetails or even a lock mitre joint would be perfect. I cut the mitres on a compound mitre saw and used a tablesaw with the blade tilted to 45° to cut the slots in the mitres for the splines. I used splines made from European Beech to join the mitres and Ebony inlays top and bottom for effect. Ebony isn't a great gluer so I did't use it for the entire spline. Step 4.
Make a template for the handles and cut them out. I used a scroll saw, but a fine blade on your bandsaw will do the same thing. You might not get as tight a curve but you can adjust your handle design to suit. If you like to work with hand tools, A coping saw would also work. Step 5.
Finish off the handles using a rasp and sandpaper. This is a lovely job, with a cup of tea and the radio on, work away until you have created an elegant shape. You can tape them together using masking tape if you want uniformity. I like to work on them individually. I used a Rocket Rasp (JCC-150FC) which gives a lovely finish and doesn't tend to tear out the edges of the timber. For the curves, sandpaper taped onto a piece of dowel works well. Step 6.
Cabinet scrape and sand the insides of the tray sides. I covered the mitres with masking tape to protect them from any rounding over. I like to avoid too much sanding once a piece is assembled, it's fiddly and usually not very successful. Step 7.
I used a weak coat of white shellac to seal the tray sides. Make sure the mitres are covered with the tape and no shellac gets on them. You will reduce the glue adhesion. Pay special attention to the insides of the handles where there is end grain. This sealing coat will also show up any marks you may have missed. It will also help with cleaning up glue squeeze out in the corners. Sand back with fine paper once it's dry. Step 8. Base Panel Preparation
With such difficult grain, I put the tray base through the wide drum sander. I headed off to my mate Gerry's house to use his WDS-400. Gerry has an excellent article on our website about using drum sanders, click HERE if you would like to have a look.
After going through the drum sander, the panel still needs to be sanded through the grades on a random orbital and then finally by hand. This panel is the star of the show, so don't compromise on the finishing. I orbital sand using 180grit and 220grit and then hand sand to 400grit. Step 9.
Dry assemble the tray sides and measure to the insides of the grooves to get the finished size for the base. The panel is rabbeted to fit into the 6mm grooves using a 10mm diameter CMT® cutter on a router table. ( rabbet size is 6mm deep leaving a 5mm tongue to fit into the groove x 7mm wide). Its a tight fit into the groove but once the panel is fine sanded, it�s perfect.
When measuring the panel size, leave a bit of room for expansion across the grain, so measure the panel about 2mm short all round. If the panel expands and there is nowhere for it to go, the joint will be stressed and may break over time. Timber only expands across the grain, but you will want the gap even all round. Step 10.
Cut the panel to size and cut the rabbet Step 11.
I had a couple of holes in the highly figured part of the panel so I used Liberon wax filler to conceal them. Always go darker when using any filler. I like the waxes most of all, they don't dry out and finishes take over them well. make sure the area around is well-cleaned, if there is any residue on the surface around the hole it will show under the finish. Step 12.
Before assembly, put a sealing coat of weak white shellac on the panel and sand using 600grit paper before you assemble. Sand back with fine paper once it's dry. Step 13.
Glue up the whole tray and leave to dry overnight. In the morning, fit Ebony inlays into the corners and plane flush. fine sand all over and check. Step 14.
I chose to use Organoil Pure Tung Oil thinned about 20% with Organoil Citrus Turps, and waxed with Liberon Black Bison Neutral Paste Wax. Tung oil is a beautiful finish and dries hard, giving it a good level of moisture resistance. Feel free to use your favourite finish. |