Untitled Document There is a myriad of scroll saw projects to consider, however this one caught my imagination and opens the door to a number of future possibilities.
I took the lead from the book “Scroll Saw Portraits” by Gary Browning. He sets out a very organised series of steps to plan and proceed through this project. I admit I was a bit ambitious with my first attempt – I converted a photo of myself and set out as per instructions in the book. It was difficult to include all the facial wrinkles and glasses etc and the result was way off the mark.
Back to the drawing board and my next subject was my grand-son Henry. Much more straight forward and cleaner lines to follow. I abandoned the instructions in the above book and devised a simpler method that proved to be very workable and achieved our desired result.
Step 1:
Initial head shot photo of Henry from front on; include neck and top of shoulders.
Step 2:
Scan the original photo and convert to black and white print. Ensure there is enough “detail” of facial features etc to enable recognisable silhouette of portrait.
Step 3:
Enlarge the size of black & white photo to suit an A4 frame, print as black and white copy, then “outline” the sections to be cut out and removed. Include sections of neck, shoulders and clothing.
Step 4:
Use masking tape to stick the top edge of the photo copy to the selected 3mm MDF panel. Trace the “cutout” sections on to MDF board using suitable graphite or carbon paper. Check that all sections “copied” on to MDF before removing masking tape and photo.
Step 5:
Drill small holes through marked “cutout sections.” I used a small drill in a Dremel too.
Step 6:
Start removing “cutout” features; working from the centre of the project.
Step 7:
Photo shows centre features removed
Step 8:
Photo shows midway through “cutouts”
Step 9:
Photo shows all features removed and project backed up against “black paper”
Step 10:
Photo shows comparisons of 3 key stages of progress
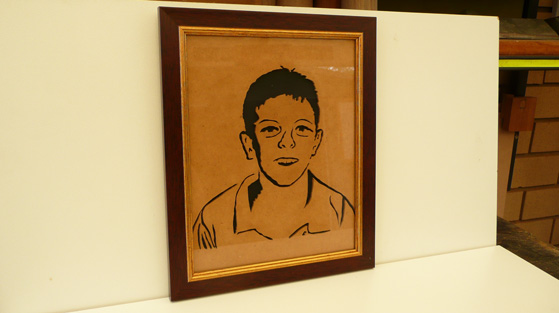
Conclusion: Henry and I are happy with the end result. Future options include extending the portraits to include Grand- daughter Abigail, review old family photo albums and select suitable subject matter: follow on portraits of Henry and Abigail each 5 or 10 years perhaps. A challenging but satisfying project.
Click here to see our scroll saw range.