Make a Marking Gauge
Bruce Sharp is one of our highly skilled staff members from our Melbourne store. Bruce has been a manual arts teacher for many years and has a treasure trove of great small projects to make. His marking gauge is a terrific project for a Saturday spent in the workshop or a quiet evening after dinner. It’s a great accompaniment to his Small Bow Saw Project.
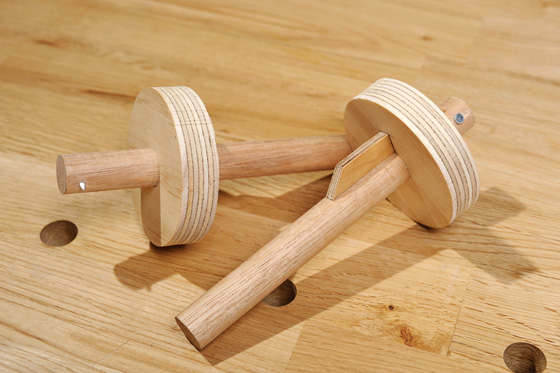 |
The name of a marking gauge speaks for itself, it leaves marks. These marks are parallel to edges or reliably repeated measurements. Using a marking gauge speaks about a woodworker’s trust in his hands and commitment to accuracy.
This project is: cheap, made from scraps, as good as many bought ones and a trophy of achievement on my tool wall. It makes a great gift for a budding woodworker or a great project to make with someone just starting out on their woodworking path.
If you make it and are in the Melbourne shop on a Saturday, tell me how you went.
 |
Processes
Instructions are sparse for I believe the drawing says enough. In the making, however, I used two cool skills that are worth mentioning.
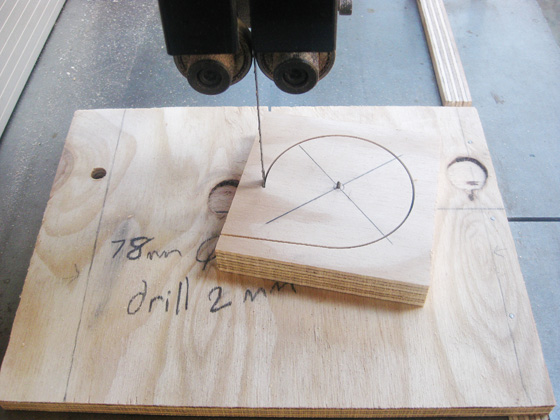
Skill 1.
The circle could be cut with a hole-saw, but I didn’t have one of a practical size. I made a circle cutting jig to use on my band saw (the nail forms the pivot point and the jig can be moved into or away from the blade to change cutting diameter).
 |
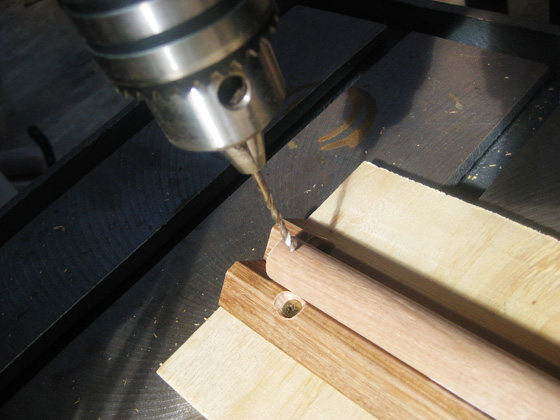
Skill 2.
Holding a piece of dowel on the drill press presents problems. Drilling reliably through its diameter is difficult. The jig in the picture is fabricated from a couple of pieces of quad and a scrap of ply. I position the jig by putting the point of the drill in the centre and clamping it in position. The dowel now self-centres itself and doesn’t roll anywhere.
 |
 |
Modifications
I have designed this project for simplicity. A few modifications would transform it from a primitive tool into a grand production:
- Use a really nice piece of wood. This will be the scrap that was small, but just too pretty to throw away.
- Make the wedge from metal. Aluminium or brass would function. Put some time into shaping the wedge so that it is kind to a finger as it is pushed into place.
- Instead of drilling a hole in in the middle, cut a mortise.
- Grind a small broken drill to fine point. You will have a high speed steel pin.
We’d Love to see what you produce, so send in photos when you are finished.